

Now on to the Perspective Tutorial I promised Friday! You may want to refer back to that post for key elements in a successful perspective layout.
Here, again, is the finished layout
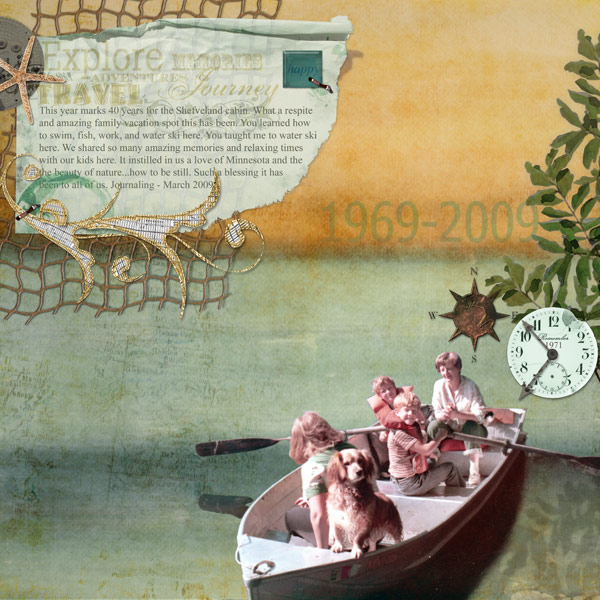
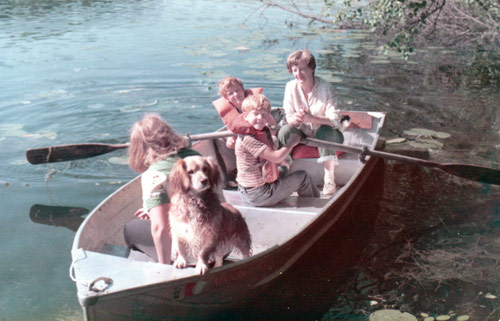
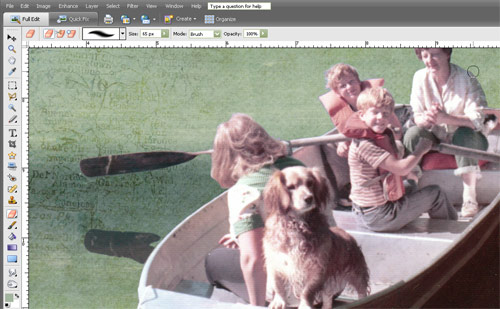
This page uses a scanned image from 1971 of my husband's family at their lake cabin. Every time I talk about scanning I make a reminder to be sure to scan images in at a very high resolution, as most scanners default to 200 dpi. I recommend 300-600 dpi.
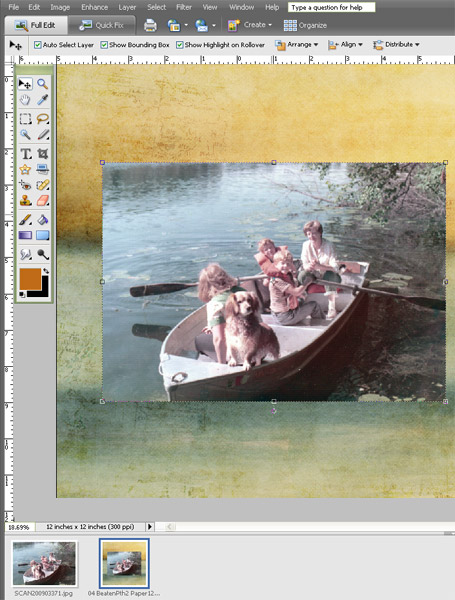
Open your image editor, such as Photoshop Elements. Adobe Photoshop and Paint Shop Pro follow very similar steps. Open image and background paper you want as the backdrop of your perspective layout (File>Open)
Drag image onto paper. To do so, click on image in Photo Bin at lower left of screen to make it the active image in window. Click, hold, and drag image downward onto thumbnail of paper in Photo Bin. Release mouse.
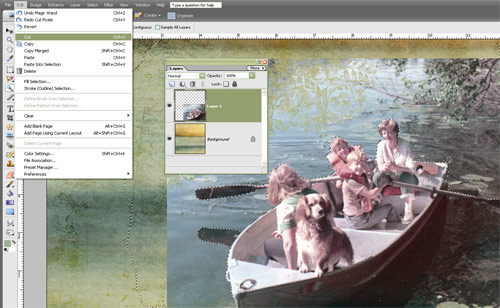
Decide on what part of image you want to keep for perspective page. For my example, I wanted to retain the oars, oar shadow, and boat shadow as they all contribute to the 3D feel I was going for, and make the process much easier as I don't have to make my own shadows for these.. Using your favorite selection tool, remove extraneous portions. I found the magnetic lasso tool worked well, since the edges of the subject were different enough from the water background. You may find the Magic Wand tool or Magic Selection Brush work well if you have a fairly solid background to extract.
Once you have your selection complete, feather the selection by 1 pixel (Select>Feather) to give a slightly softened edge. Cut this selection to leave just your subject (Edit>Cut or press Ctrl-X/Cmd-X). Note: most of my shortcut keystrokes are for a PC, but I hope to try to add more for the Mac.
Select the Eraser Tool and a large soft brush to remove large areas of unwanted background.
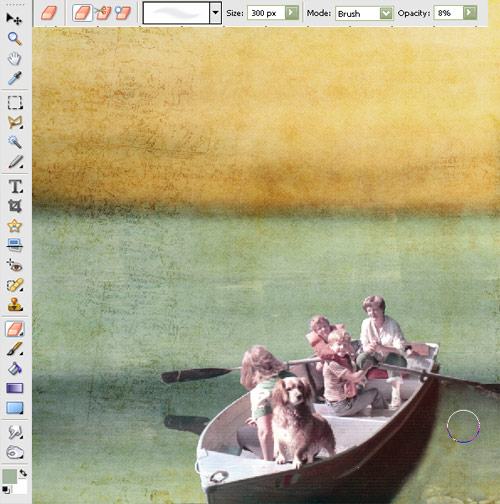
Change to a smaller brush size to remove small areas (shortcut to reduce brush size is to press the [ key; press the ] key to increase brush size).
At this point, I added a lighting effect to the background paper layer to mimic the light on the image. First duplicate the background layer (Layer>Duplicate Layer). Choose Filter>Render>Lighting Effects. In dialog choose Omni type light for a more broadcast diffused light. I set mine at Intensity of 18. Press OK. Now adjust opacity of this top layer of your background to reduce the lighting effect until you are satisfied.

Next I added branches from Nature's Sketchbook Elements 3 - Think Spring to look like tree branches hanging over the water (as in the original photo). To add more 3D effects, I added a reflection of these tree branches by duplicating each tree branch, flipping them horizontal, distorting their perspective to accurately reflect the plane of the water, blurring them about 8 pixels and a soft 20% opacity, since the branches were so far from the water. See my tutorial on realistic drop shadows here for more details on creating your own drop shadows.
The remainder of the page was created in a 2D plane, dragging on elements, making some of my own lifted drop shadows, and blending the title 1969-2009 into the background by changing the layer blend mode to Pin Light at 61% opacity, duplicating it, and setting the top title layer to Normal at 100% opacity.
Julie Mead also shares her process in creating the adorable page below:
Explore Life by Julie Mead
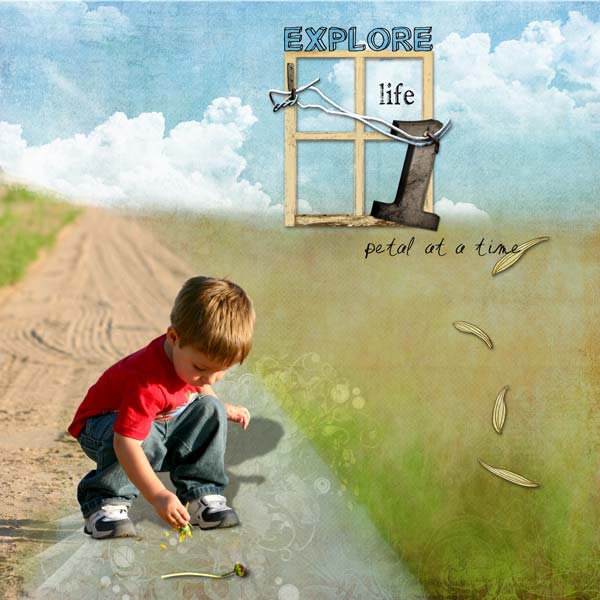
"I duplicated the photo layer, then extracted my grandson from the top layer, adding in my own shadow. Next, I blended the bottom photo layer using a blending mode and did a soft erase to the edges of it. I wanted to show a difference between the real photo and the Off the Beaten Path background paper to give it a slight surreal feel, so I added one of my swirly flourishes from Viva La Blooms. I erased any part of the flourish that was overlaying the photo."
As mentioned in Friday's post, our Perspective Gallery has more inspiration by our team for creating 3D layouts. Many of the team added some awesome perspective shadows to their main subject, fooling the eye into believing they were in the scene. Others were able to use the existing shadows in the image, as I did.
Have fun!
Michelle